hnlzm@lvmeikapton.com
+86 13787123465


Hunan Lvzhimei New Material Technology Co., Ltd.

NameDescriptionContent
How to Apply Self-Adhesive Tapes for Electronics Masking |https://www.lvmeikapton.com/
Source:
|
Author:Koko Chan
|
Published time: 2025-06-04
|
722 Views
|
🔊 Click to read aloud
❚❚
▶
|
Share:
Step-by-step guide to masking gold fingers and components using specialized tapes.
Keywords: masking techniques, Self-adhesive back blocking spray paint tape, Strong adhesion and blocking high temperature tape, Kapton application, PCB protection.
Keywords: masking techniques, Self-adhesive back blocking spray paint tape, Strong adhesion and blocking high temperature tape, Kapton application, PCB protection.
How to Apply Self-Adhesive Tapes for Electronics Masking
AbstractTitle: How to Apply Self-Adhesive Tapes for Electronics Masking
Description: Step-by-step guide to masking gold fingers and components using specialized tapes.
Keywords: masking techniques, Self-adhesive back blocking spray paint tape, Strong adhesion and blocking high temperature tape, Kapton application, PCB protection.
Body Structure
Principles of Effective Masking (250 words)Effective masking for electronics is essential to protect sensitive components during processes like conformal coating, soldering, or thermal treatments. Self-adhesive tapes offer a reliable solution due to their precise application, high adhesion, and resistance to chemicals and heat. Key principles include:
1.
Surface Preparation: Ensure substrates are clean, dry, and free from contaminants to maximize tape adhesion.
2.
Material Selection: Choose tapes with appropriate adhesion strength, temperature resistance, and chemical compatibility.
3.
Precision Application: Use tools like dispensers or laser alignment to minimize human error and achieve uniform coverage.
4.
Edge Sealing: Secure tape edges to prevent shifting or lifting during high-temperature processes.
5.
Residue Management: Select tapes with easy removal to avoid adhesive residue on delicate components.
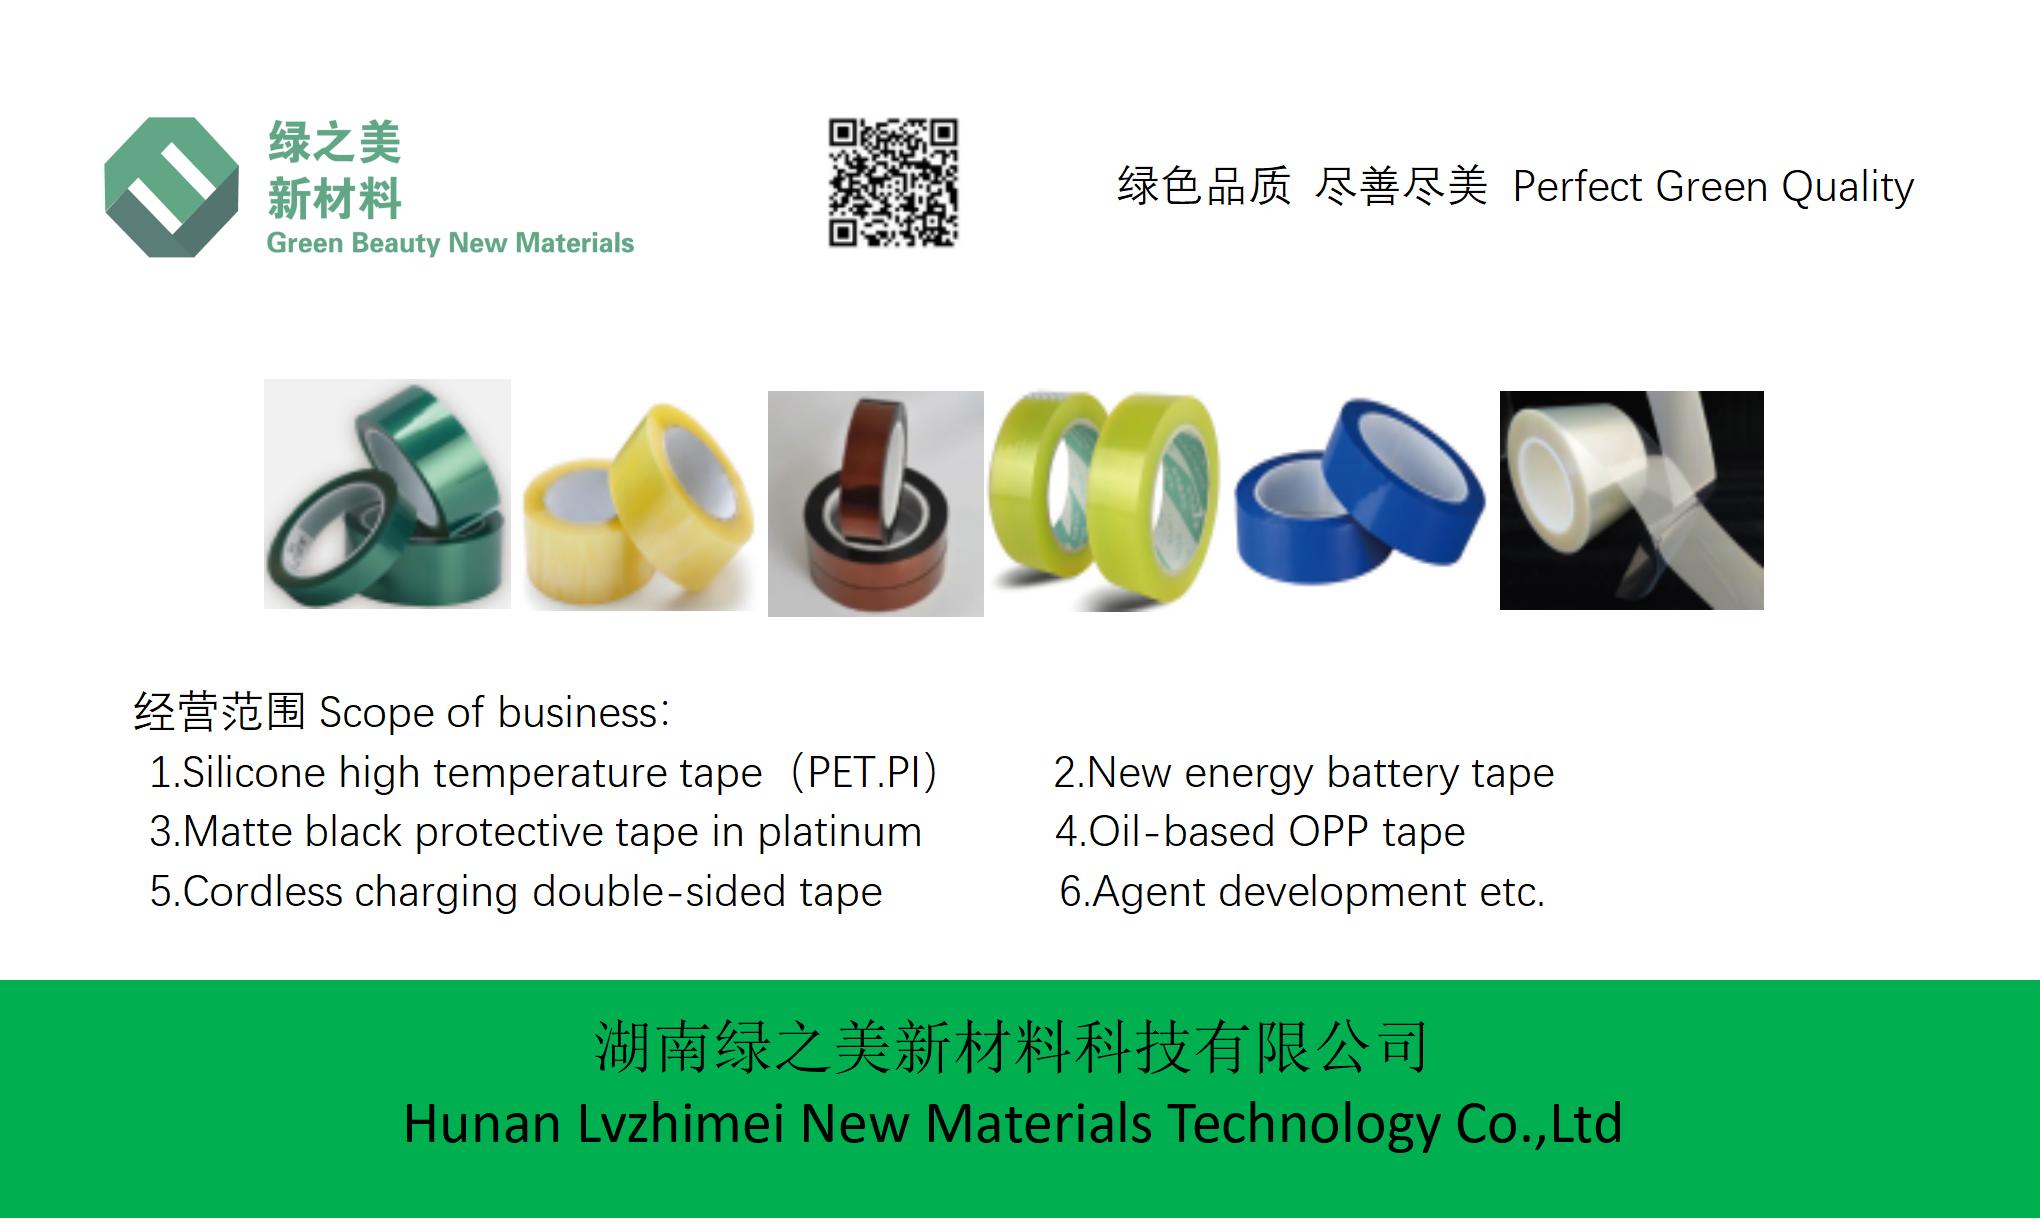
Section: Tape Selection GuideTable: Adhesion Strength vs. Surface Type
Tape Type | Adhesion Strength (N/cm) | Surface Compatibility | Key Features |
Self-adhesive back blocking | 5-8 | Metal, PCB, Glass | High-temperature resistance (up to 260°C), |
spray paint tape | Chemical barrier for conformal coatings | ||
-------------------------------- | ----------------------- | -------------------------------- | ----------------------------------------------- |
Strong adhesion and blocking | 8-12 | Ceramic, High-profile components | 耐高温 (up to 320°C), UV resistance |
high-temperature tape | |||
-------------------------------- | ----------------------- | -------------------------------- | ----------------------------------------------- |
Kapton (polyimide) tape | 3-5 | Flexible circuits, Gold fingers | Excellent dielectric strength, tear-resistant |
-------------------------------- | ----------------------- | -------------------------------- | ----------------------------------------------- |
lvmeikapton insulating | 4-7 | High-voltage areas | Anti-static properties, easy peel-off |
electrical tape |
Masking Techniques for Conformal Coating (500 words)
1.
Preparation: Clean the PCB with isopropyl alcohol to remove flux or grease. Dry thoroughly.
2.
Tape Application:
a. Use Self-adhesive back blocking spray paint tape for areas exposed to coating. Its conformal properties prevent overspray.
b. Apply tape smoothly, avoiding wrinkles. Use a squeegee to ensure complete contact.
3.
Edge Management: Fold tape edges slightly onto themselves to create a seal.
4.
Coating Process: Perform spray coating while tape acts as a barrier.
5.
Removal: After curing, peel tape slowly at a 45° angle to prevent damage.
Kapton Application for Gold Finger Protection (400 words)Kapton tape is ideal for shielding connectors and gold fingers during wave soldering or reflow processes:
1.
Alignment: Use laser alignment tools to position tape over the edges of connectors.
2.
Overlapping Technique: Apply tape in overlapping layers (2-3mm overlap) for enhanced protection.
3.
Thermal Management: Kapton’s high dielectric strength withstands soldering temperatures (up to 300°C).
4.
Inspection: Check for gaps or bubbles using a microscope to ensure complete coverage.
Section: Rework Stations and High-Temperature Masking (600 words)During component rework, Strong adhesion and blocking high-temperature tape is critical:
1.
Soldering Protection: Apply tape around heat-sensitive components (e.g., LEDs, sensors).
2.
Hot Air Gun Compatibility: Tape’s resistance to 320°C allows direct exposure to hot air without degradation.
3.
Step-by-Step Process:
a. Secure tape with 2mm overlaps.
b. Use a heat-resistant marker to label masked areas.
c. Perform rework within 10 minutes of tape application to prevent adhesion weakening.
4.
Post-Rework Removal: Cool components to room temperature before gently peeling tape.
Tool Recommendations (300 words)
1.
Precision Dispensers: Automated tape dispensers control tape width (0.5-5mm) for intricate masking.
2.
Laser Alignment Systems: Projectors guide tape placement over complex geometries, reducing alignment errors.
3.
Squeegees with Anti-static Tips: Ensure tape bonds uniformly without introducing charges.
4.
Heat-Resistant Gloves: Protect operators when handling high-temperature tapes during application or removal.
Troubleshooting: Residue Prevention (350 words)Adhesive residue can damage electronics. Use lvmeikapton insulating electrical tape to mitigate this:
1.
Preventive Measures: Apply tape with tension control to avoid overstressing adhesive.
2.
Solvent-Free Removal: Use a heat gun (50°C) to soften adhesive, then peel slowly.
3.
Residue Removal Protocol:
a. Apply isopropyl alcohol to a lint-free cloth.
b. Wipe gently until residue dissolves.
c. Avoid solvent overuse to prevent substrate corrosion.
4.
Verification: Use UV inspection lights to confirm residue-free surfaces.
Conclusion (200 words)Mastering self-adhesive tape application is vital for electronics reliability. By understanding tape properties, selecting appropriate materials, and employing precision tools, technicians can achieve flawless masking. Whether protecting gold fingers, shielding components from high temperatures, or preventing conformal coating overspray, a systematic approach ensures both process efficiency and long-term component integrity. Regular training and adherence to best practices are key to optimizing masking outcomes.
Hunan Lvzhimei New Material Technology Co., Ltd.
Quick Links


Product Categories
© 2024 Hunan Lvzhimei New Material Technology Co., Ltd.All Rights Reserved. Designed by Erge
0731 - 89717319
hnlzm@lvmeikapton.com
+86 13787123465
Room 502, Chuangye Building, No186, Guyuan Road, High-Tech District, Changsha, Hunan, China
CONTACT


